
One of the biggest mistake made while deploying a Fortigate firewall is focussing strictly on its policies between zones or interfaces. Little do people know, LOCAL-IN policies also need configuration to protect the firewall from exposing remote access to it’s controls and management interfaced. There are tens of thousands of fortigate firewalls on the internet which lacks this configuration and I consider this to be the biggest vulnerability on these firewalls to date.
Simply enabling the local-in policy option in the GUI serves little purpose in configurating it and still requires you to use line commands to set it up properly. It’s simple to perform and will keep bad people out of your network core.
Here’s how you can block any internet traffic from being able to access your firewall services exposed on your internet facing interface.
For example, let’s assume your internet facing interface is “wan1”.
In the firewall’s command line (CLI), type the following;
> config firewall local-in-policy
> show
You should get an empty result in your listing. This means your local-in has not been configured yet. Like every other firewall policies, the firewall will execute them in the order they we’re created, using the lowest policy ID number first.
To completely blocks any internet traffic from being able to get to your management services, type the following;
> config firewall local-in-policy
> edit 100
> set intf “wan1”
> set srcaddr “all”
> set dstaddr “all”
> set service “ALL”
> set schedule “always”
> set action deny
> next
> end
Now lets have a look at the WAN1 interface:
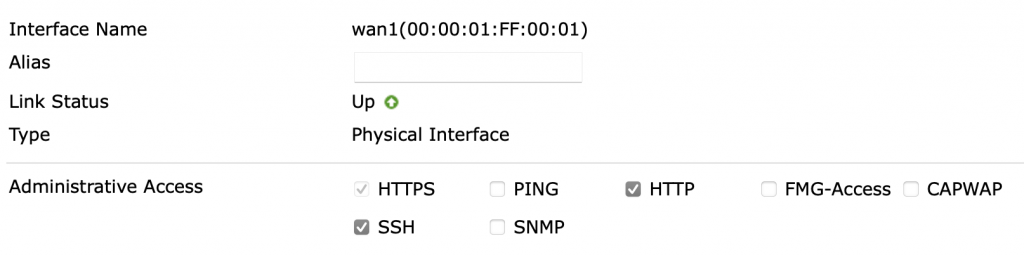
Even if your remote management HTTP/HTTPS/SSH services are enabled on the wan1 interface, every source IP addresses trying to access your remote management services IP on the “wan1” interface side, will get blocked. With this simple configuration in place, your firewall’s management security has been harden. You can apply as many local-in policies as you need, but beware not to lock yourself out !
For example if you want the ability to access your Firewall’s management GUI from a trusted source IP address on the internet (Another remote office for example), you would write the folowwing local-in policy:
> config firewall local-in-policy
> edit 100
> set intf “wan1”
> set srcaddr “n.n.n.n” <— (Trusted IP address or IP group)
> set dstaddr “all”
> set service “ALL”
> set schedule “always”
> set action allow
> next
> edit 120
> set intf “wan1”
> set srcaddr “all”. <— (Every other public IP are blocked)
> set dstaddr “all”
> set service “ALL”
> set schedule “always”
> set action deny
> next
> end
This process can be repeated for internal interface, allowing only network management IP/Subnets/vlans from being able to access the firewall management interface, blocking peole on your own internet network from being able to access or attempt to breach the firewall.
You could harden your local-in policies to the point where only the firewall administrator are allowed to be able to reach the login portal. The BIG advantage of doing other than dramatically increasing the firewall security, is that it prevents hackers from exploting bug or vulnerabilities following a FortiOS update/upgrade. But when you do update/igrade your OS, test your policies to make sure they wren’t impacted or modified by your firewall maintenance.
Once your local-in policies have been configured, you don’t need to maintain them unless you need to make modifications to allow more IP addresses.
Security TIPs: Never enable or use HTTP management. Only use HTTPS and/or SSH remote management services. If your Fortigate also acts as your company’s VPN, you should apply local-in policies to the VPN interface to block remote hackers who have stolen one of yur user’s login & credentials and may attempt to break in your firewall’s management.
I often configured a network administrator backdoor VPN access seperate from the rest of the company’s VPN for remote firewall management. Your users might not all have good intentions, so apply a zero-trust architecture when possible.
If a hacker acquires control of your firewall’s management, they can modify its firewall policies and give themselves direct access to any other hosts on your network and begin dwelling on your network infrastructure. Using a SIEM and monitoring changes performed on your firewall’s configurations would help alert you if changes are executed without your knowledge.
And finally, you should download and learn how to use X-CA to create and manage your own signed private CA certificates and firewall certificates. You can then distribute the firewall’s public ROOT-CA public certificates (Public Key) to your users manually or using WIndow’s active directory. This will allow you to use the firewall’s SSL content inspection features, without having browser complain of untrusted certificate. X-CA is realiable and free. Some HTTPS services may not be fully compatible with SSL content inspection and you might have to create exception firewall policies to bypass the SSL inspection for those services.